:format(webp))
This guide will walk you through how to install, configure, and verify proxies using Proxyfire on a MacBook. Follow the steps below to get started.
1. Install Proxifier
Download Proxifier from the official website.
Open the downloaded .dmg file.
Drag the Proxyfire app into your Applications folder.
Launch Proxyfire from Applications.
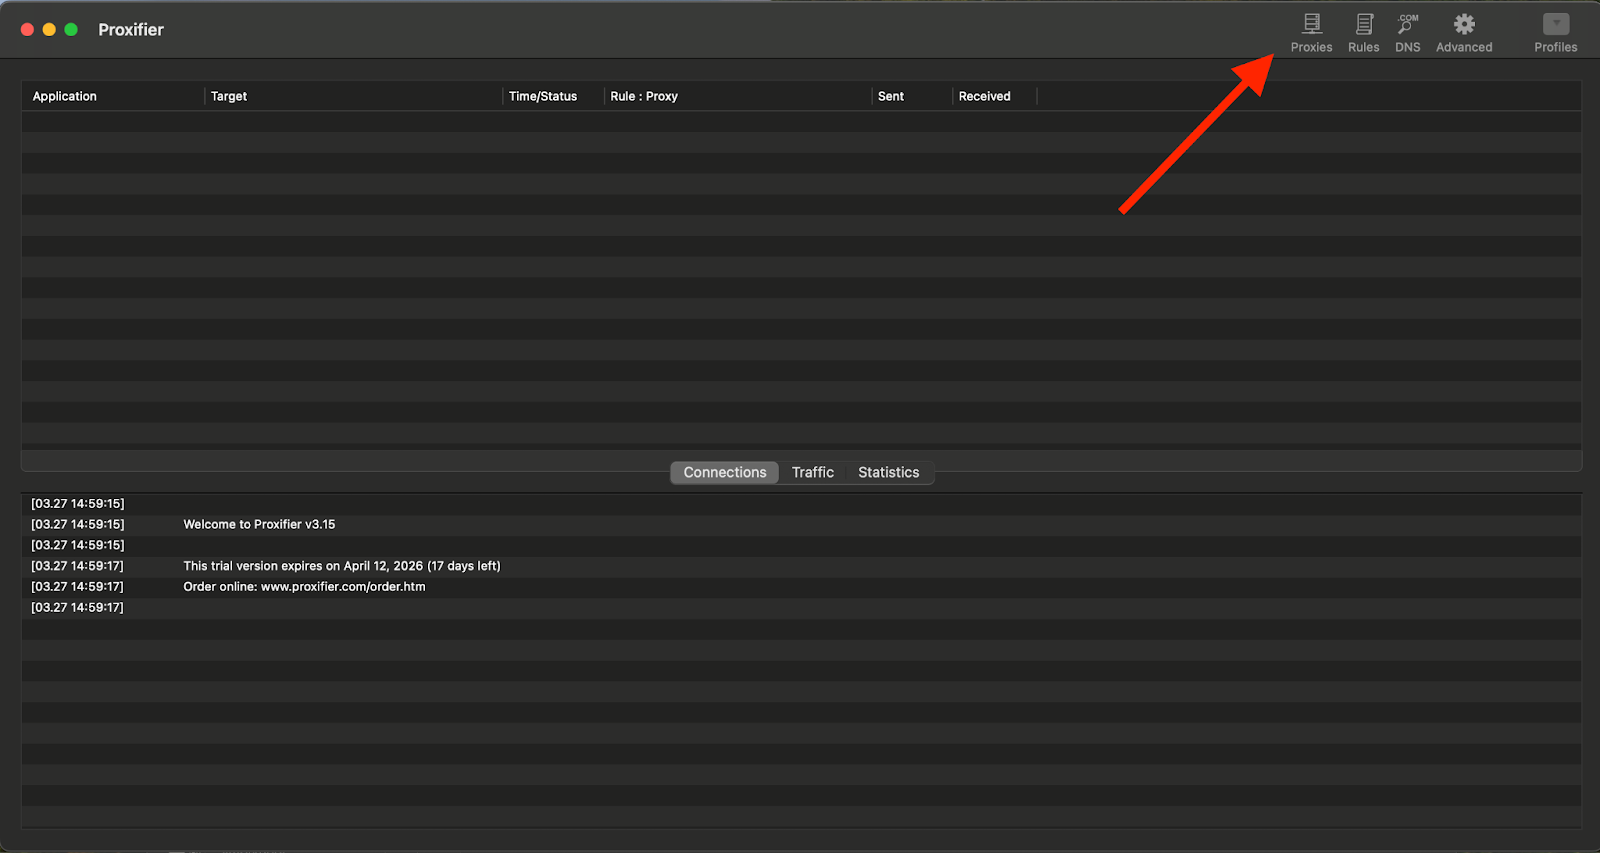
2. Open Proxifier and Access Settings
After launching Proxifier, you will see the main dashboard.
Navigate to the Profiles or Proxies section (depending on your version).
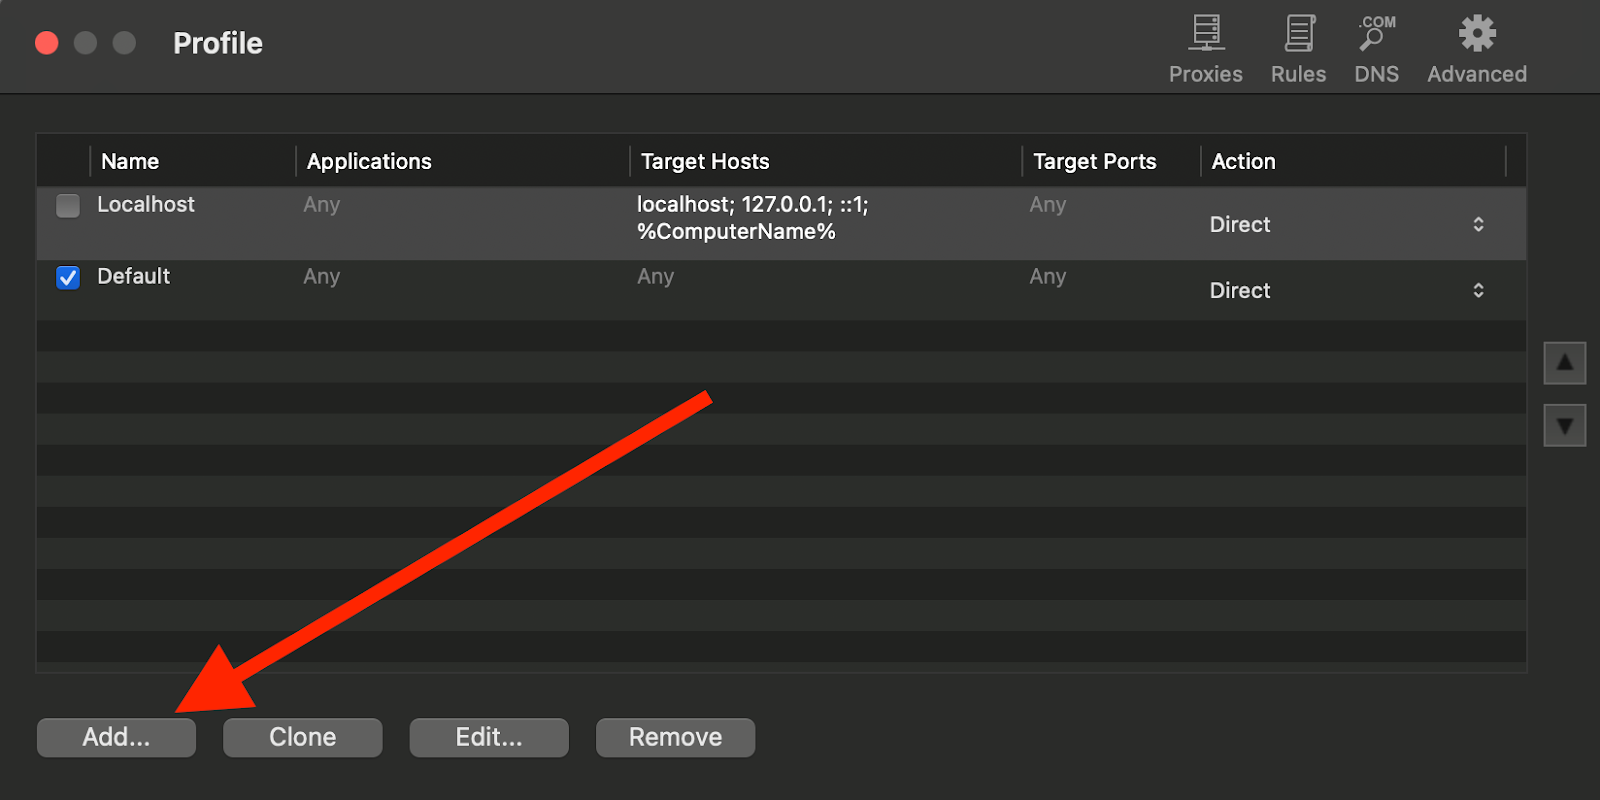
3. Add a Proxy
Click Proxies (or the “+” button).

Enter your proxy details in the following format:
Host: your proxy host
Port: proxy port
Username: your login
Password: your password
Save the proxy.

4. Configuring Rules
Rules determine which traffic is routed through the proxy and which connects directly.
Go to Profile → Rules.
Click the "+" button to add a new rule.
Fill in the fields:
Name — give your rule a name (e.g., "My Rule")
Applications — specify a particular app or leave it as Any for all applications
Target Hosts — enter specific hosts/IP addresses or leave as Any for all traffic
Target Ports — enter specific ports or leave as Any
Action — choose what to do with the traffic:
Proxy — traffic is routed through the proxy
Direct — traffic connects without the proxy
Block — traffic is blocked entirely
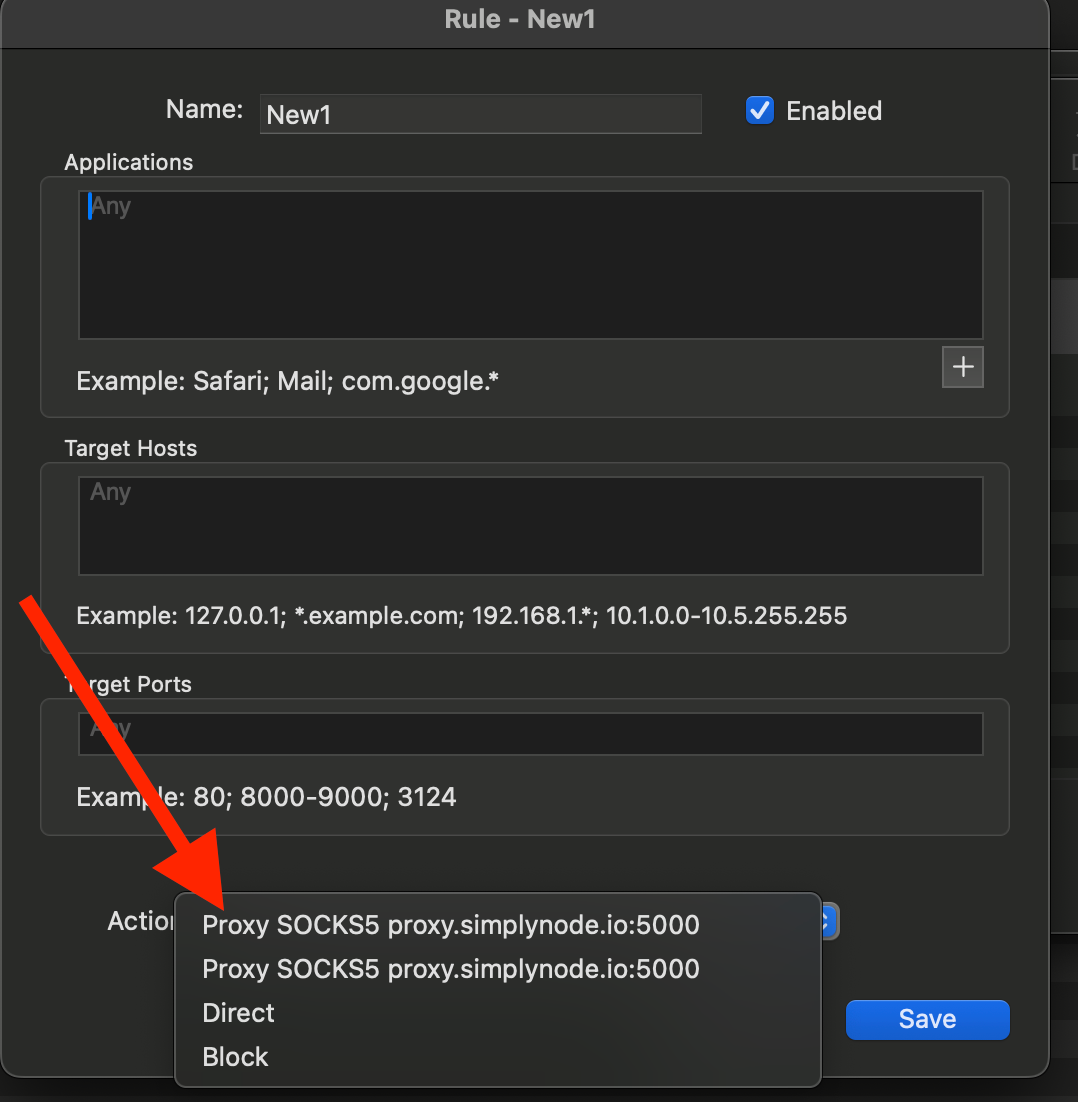
Click OK and save the rule.
Tip: The localhost / 127.0.0.1 rule should always be set to Direct so that local traffic bypasses the proxy. Proxifier usually creates this rule automatically.
5. Enabling the Proxy
Make sure your proxy is added in the Proxies section (Step 3).
In Proxification Rules, confirm that the Action column for your rule is set to your proxy.
Proxifier starts working automatically once launched — there is no separate on/off toggle.
To verify that your traffic is going through the proxy, open the Log or Connections tab on the main screen — you will see active connections along with which proxy they are using.
6. Verify That the Proxy Works
Open your browser (Safari, Chrome, etc.).
Visit a website like:
Check if the displayed IP matches your proxy IP.
If the IP has changed — your proxy is working correctly.
7. Troubleshooting
If your proxy is not working:
Double-check login, password, IP, and port.
Make sure the profile is active.
Confirm that the selected apps are routed through Proxyfire.
Restart Proxyfire.
Try another proxy to rule out issues with a specific IP.
8. Tips for Better Usage
Use different profiles for different tasks.
Avoid running too many apps through one proxy to prevent slowdowns.
Done
You are now ready to use Proxyfire on macOS.
If you are using residential or mobile proxies, you can further optimize performance by adjusting rotation settings and targeting specific locations inside your proxy dashboard.
:format(webp))
:format(webp))
:format(webp))