:format(webp))
Step 1: Install V2Box
Download and install V2Box
Step 2: Proxy Configuration
Manual Setup
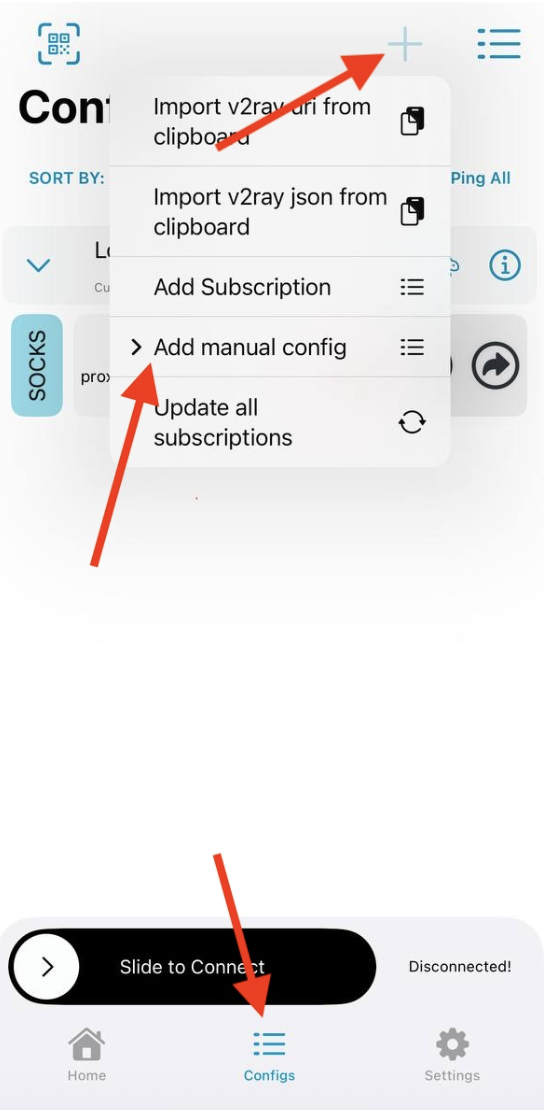
Tap on the “Configs” tab at the bottom of the screen.
Then tap the “+” (plus) button in the top-right corner to add a new configuration.
Choose “Add Manual config” to add proxy settings manually.
Choose “socks”
Fill in the following fields using info from your dashboard:
Remarks
This is just a label or name for your configuration.
➤ Example: SimplyNode
Address
Enter the proxy hostname from your SimplyNode dashboard.
➤ Example: proxy.simplynode.io
Port
Enter the port number provided in the dashboard.
➤ Example: 5000
User
This is your proxy username, which usually includes session and country settings.
➤ Example: country-us-sessionlength-3600-sessionid-...
Password
Enter your proxy password from the dashboard.
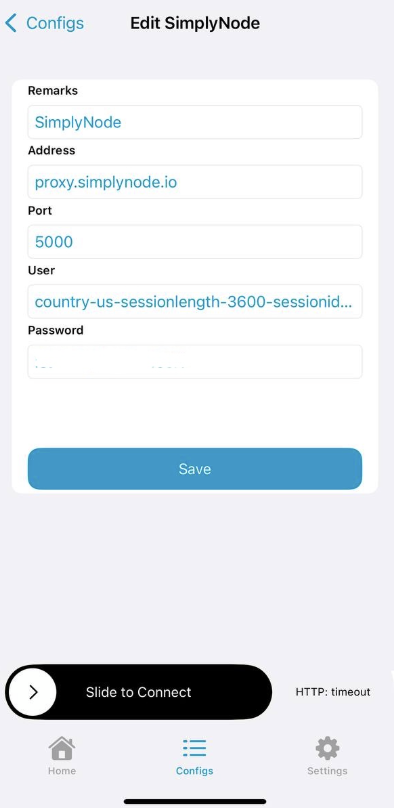
Step 3: Tap "Save"
Tap “Save” to save the configuration.
Then tap “Slide to Connect” to start using the proxy.
If everything is entered correctly, the status will update, and your traffic will be routed through SimplyNode.
:format(webp))
:format(webp))
:format(webp))