:format(webp))
FoxyProxy is a third-party extension that allows you to easily configure proxies directly within Chrome, Firefox, and other Chromium-based browsers. In this guide, we’ll show you how to set up and use SimplyNode Residential and Mobile Proxies with FoxyProxy.
First of all, download and install the FoxyProxy extension:
Instructions for Chrome:
Install the FoxyProxy Extension for Chrome.
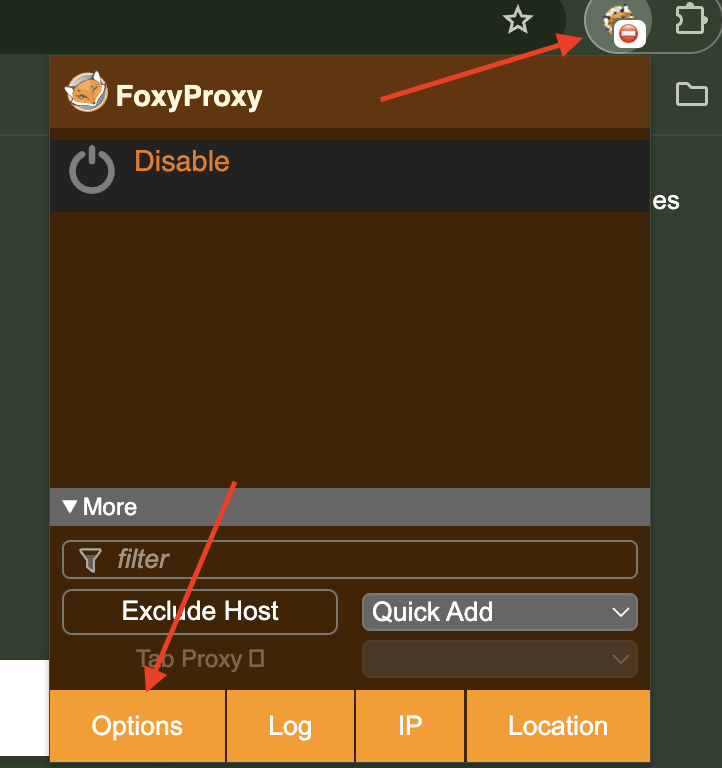
Click the FoxyProxy icon in the upper-right of the browser and choose Options. This opens the FoxyProxy Options page.
3. Click on the “Proxies” tab located on the top panel next to “Options”. In the proxies menu, click on “Add”.
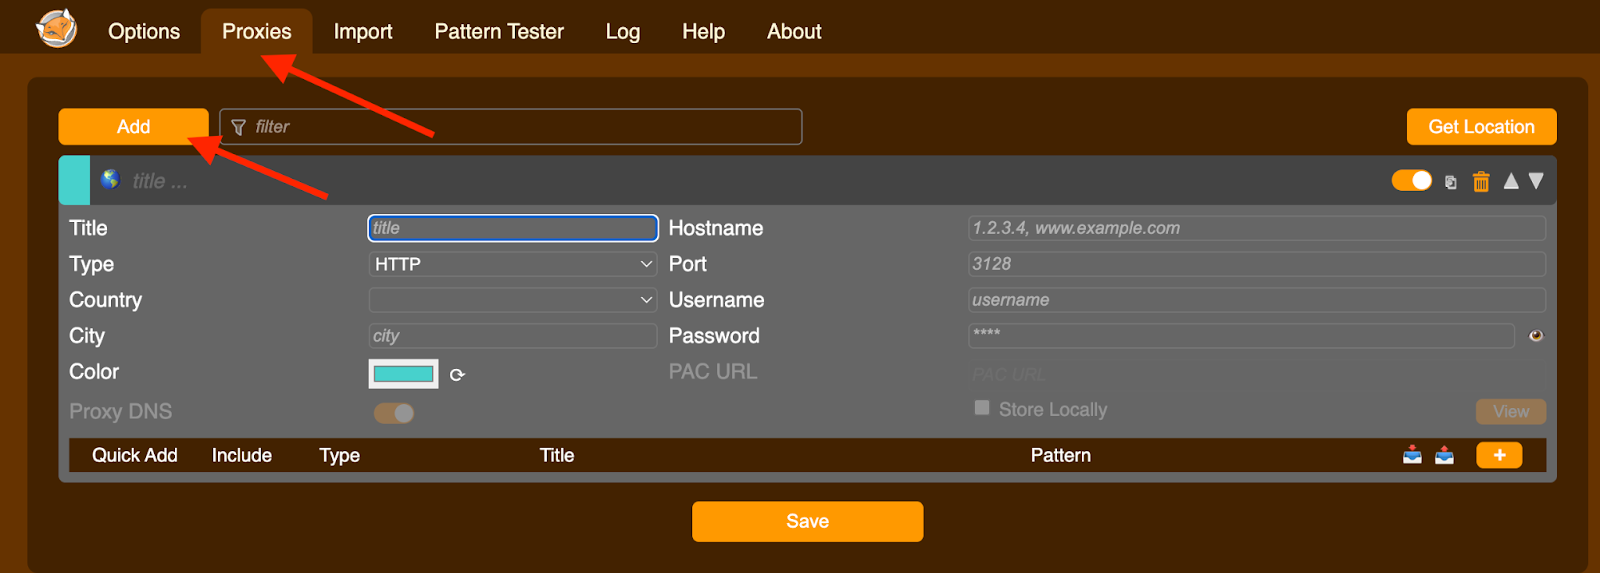
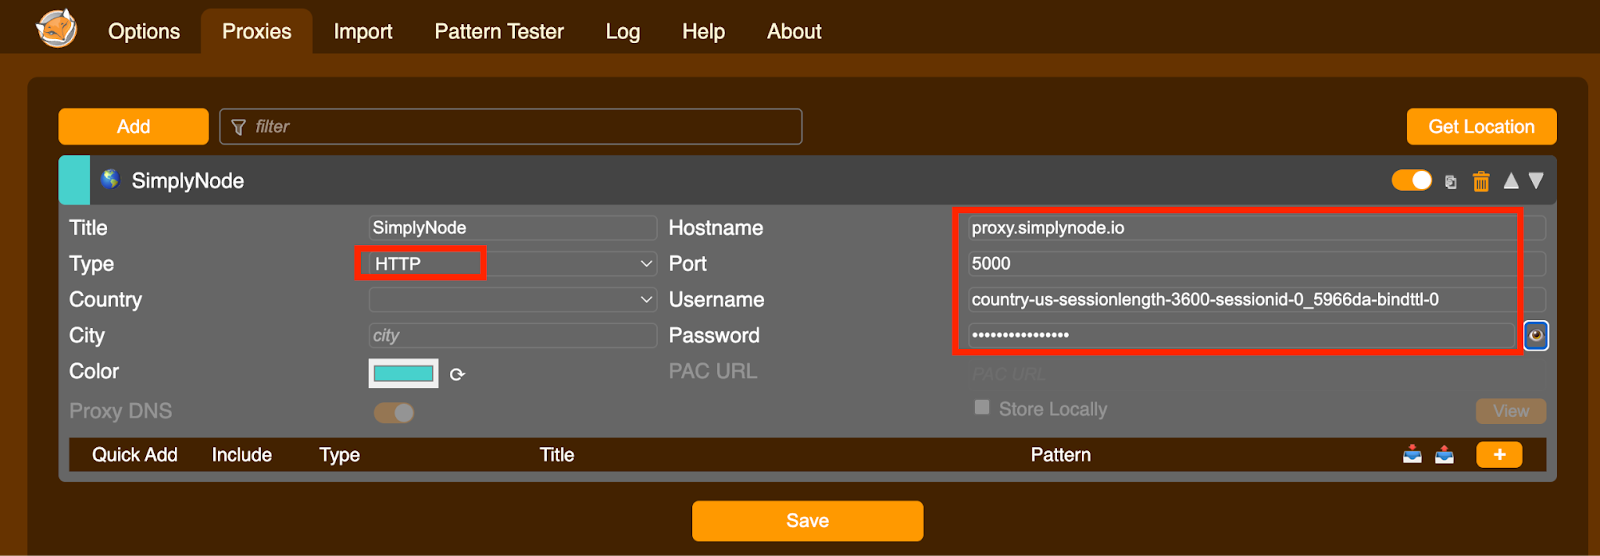
4. Fill in the Proxy Fields in FoxyProxy
Title: SimplyNode
This is just a label for the proxy. You can name it anything you like to help you identify it.
Type: HTTP
Hostname: proxy.simplynode.io
Port: 5000
Username: country-us-sessionlength-3600-sessionid-0_5966da-bindttl-0
This is your proxy authentication login. It often contains session parameters
Password
Enter your proxy password here. Enter the password from your dashboard here. It is also generated for your proxy session.
Click Save to store the configuration.
5. To Enable the Proxy:
Click on the proxy profile labeled “SimplyNode” (as shown in the screenshot).
Once selected, the proxy will become active, and all your internet traffic will go through the configured proxy server.
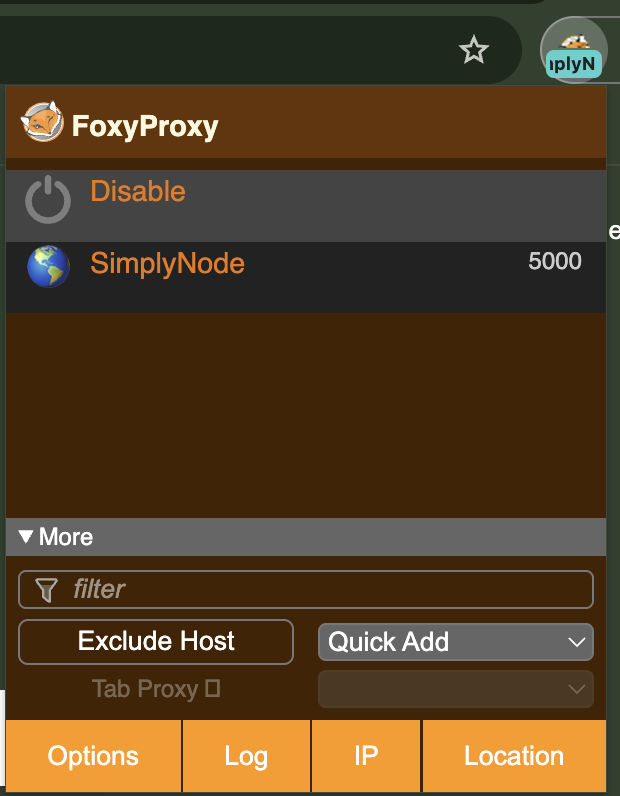
To Disable the Proxy:
Click on the option labeled “Disable”.
This will turn off proxy usage and return your browser to direct internet access (without a proxy).
6. Check the IP https://www.iplocation.net/
:format(webp))
:format(webp))
:format(webp))