:format(webp))
What is Proxy SwitchyOmega?
SwitchyOmega is a well-known browser extension designed to assist users with easy configuration of proxy servers and switching between them in Google Chrome and Mozilla Firefox. Users can most conveniently set up and switch numerous proxy profiles for a variety of purposes, including privacy protection, content that is only available outside certain areas, and geo-restrictions. With SwitchyOmega, users can configure HTTP, HTTPS, and SOCKS proxies in no time and can even design automatic proxy switches triggered by specified URL patterns.
Proxy SwitchyOmega is a modern version of proxy management tools, available on the Chrome Web Store, and works seamlessly with your preferred browser. Its key features include the ability to manage and switch between multiple profiles and different proxy configurations with just a few clicks. You can easily switch between multiple proxies quickly to suit various needs, bypass geo restrictions, and enjoy secure browsing by selecting the right proxy for each situation. As a comprehensive proxy management tool, SwitchyOmega offers optimized performance, advanced settings, flexible proxy configurations, rule lists, and auto switch features. The extension has a straightforward UI and many powerful customization features, which is perfect for users who want to have a more secure and efficient way of their online activities. It is useful, especially for tech-savvy users, security users, and users who work in secured networks.
1. Download and install SwitchyOmega extension:
Configure SwitchyOmega extension on Chrome:
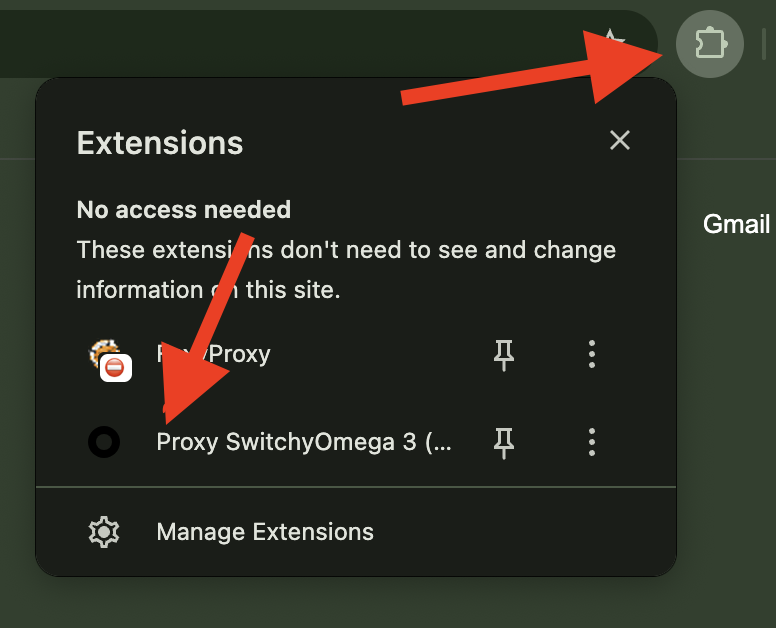
Install the SwitchyOmega for Chrome.
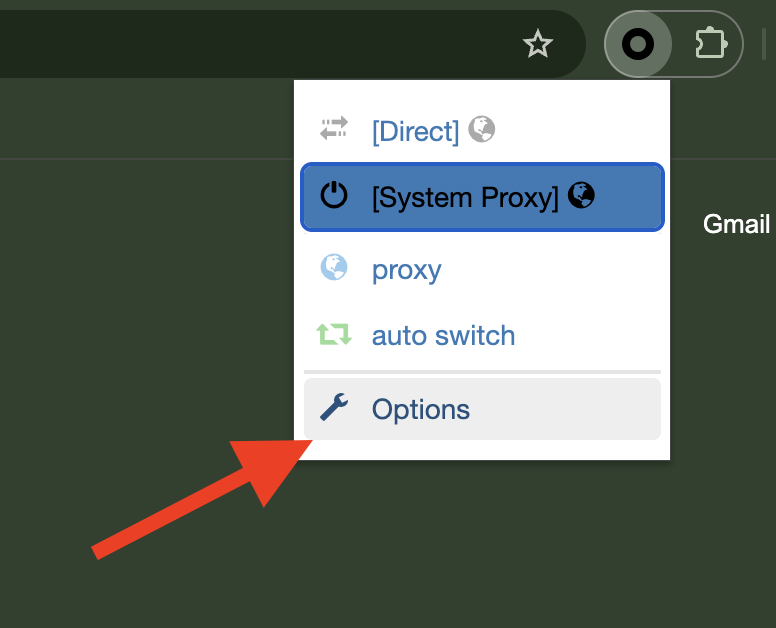
Click the SwitchyOmega icon in the upper-right of the browser and choose Options. This opens the SwitchyOmega Options page.
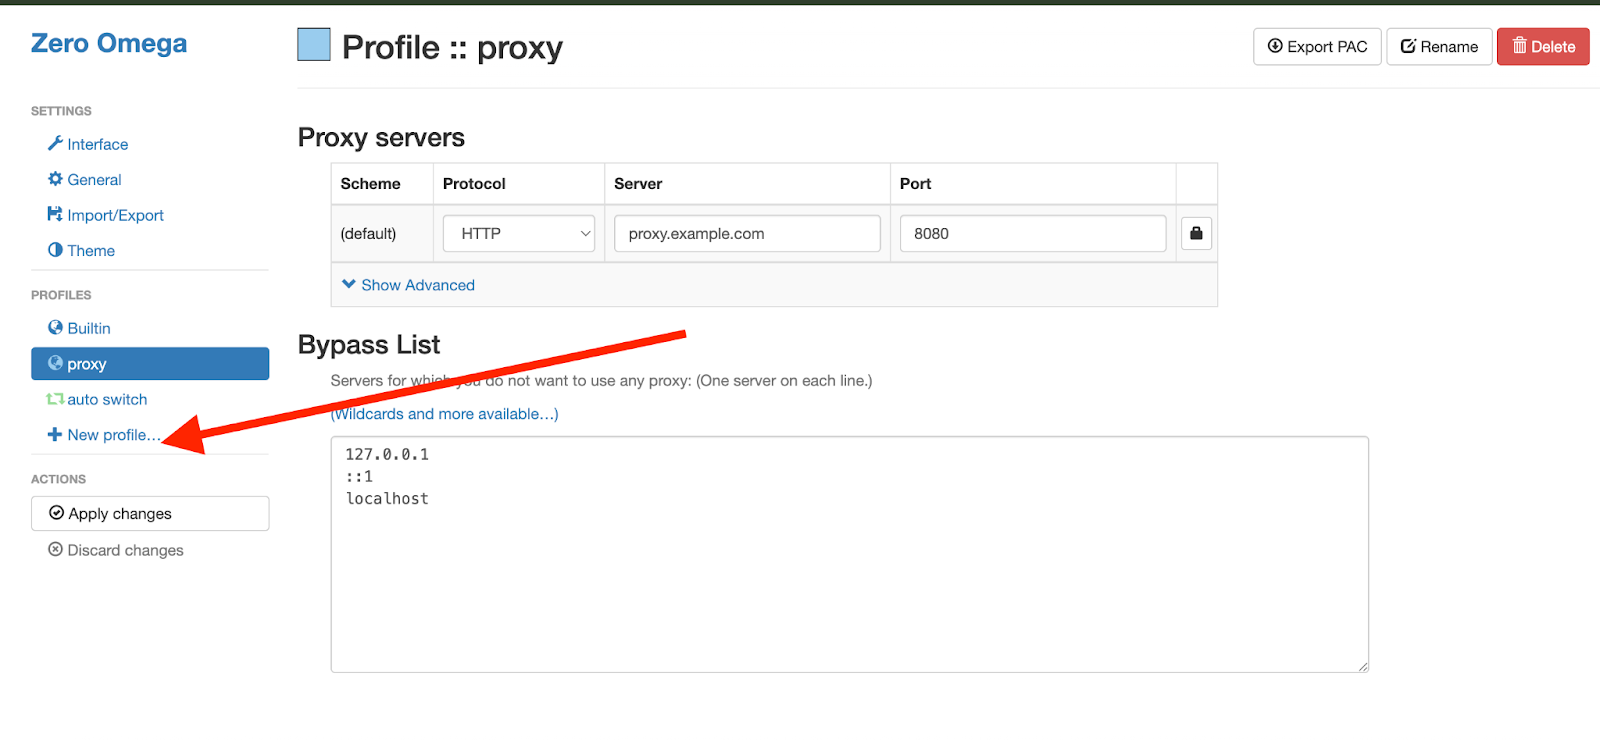
3. Click on the “New profile” located in the left sidebar.
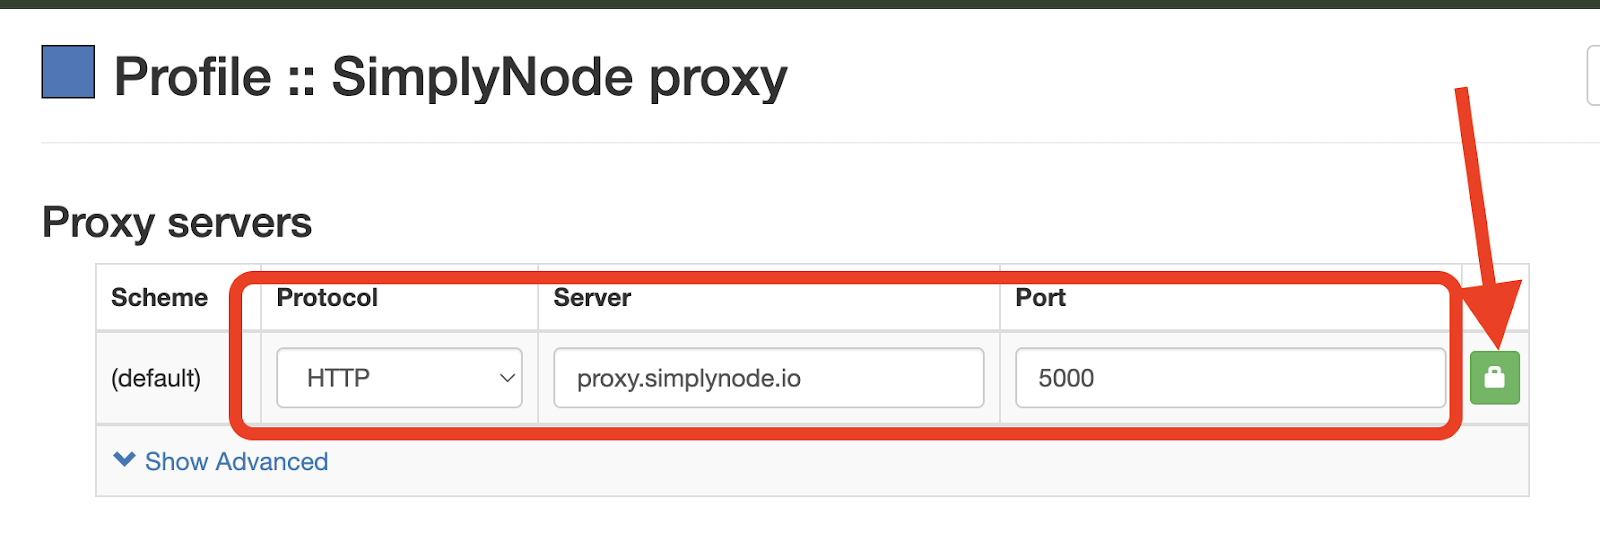
4. In the pop-up window, enter the profile name (e.g., SimplyNode proxy), select the type (e.g., Proxy Profile), and click the Create button at the bottom right.

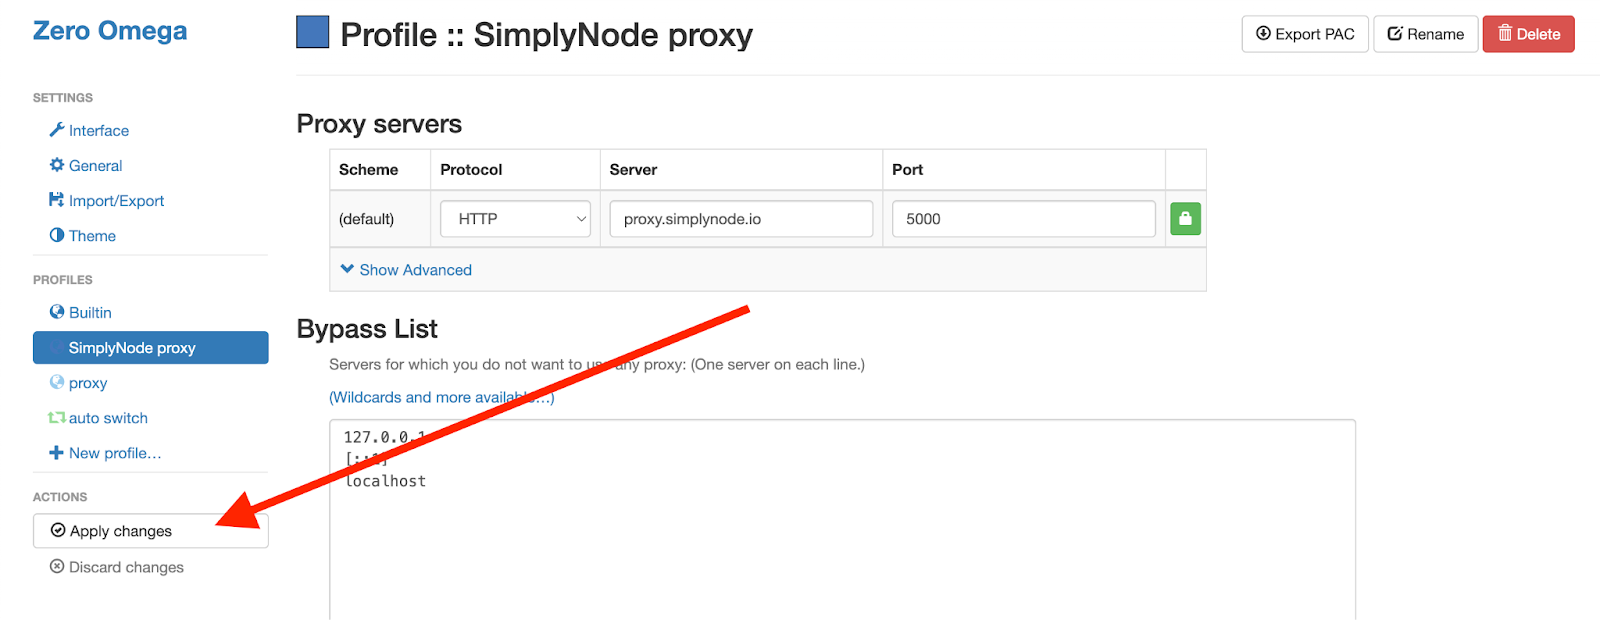
5. Fill in the proxy server details under the 'Proxy servers' section of your profile:
Protocol: Select HTTP from the dropdown menu
Server: Enter proxy.simplynode.io
Port: 5000
Then, click the lock icon on the right
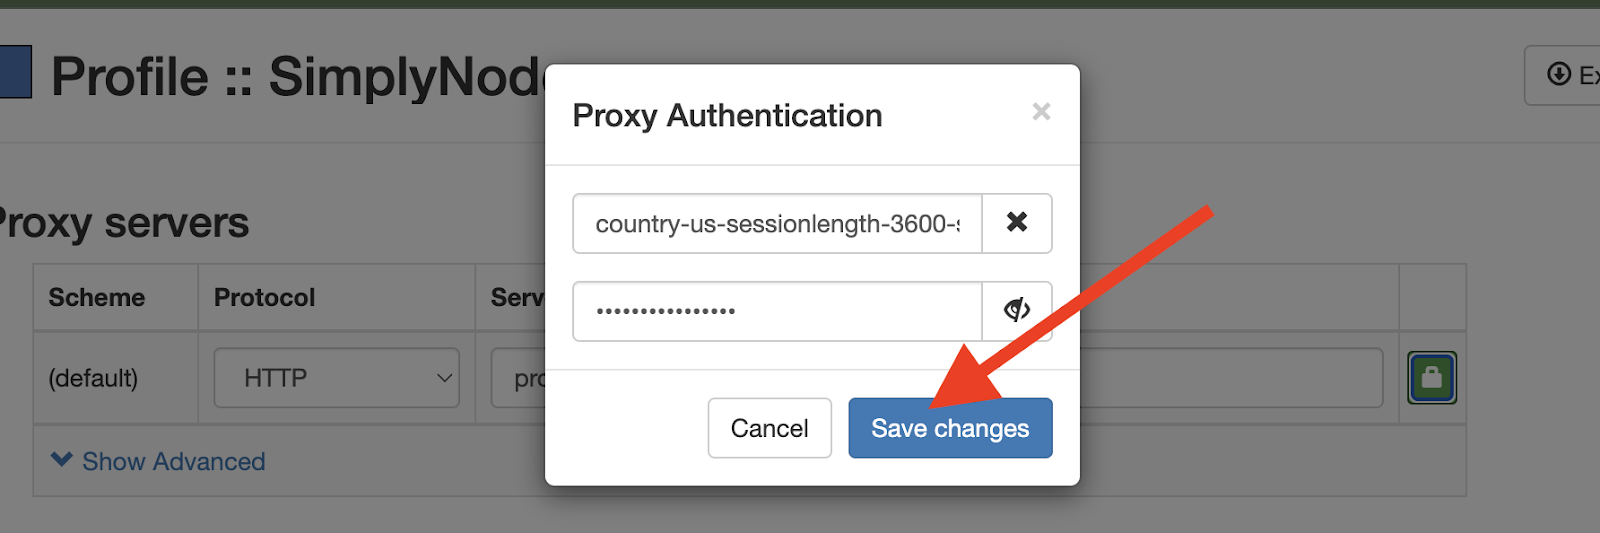
6. Enter your proxy credentials from the proxy list generator in the SimplyNode dashboard:
In the Username field, paste the generated login string (e.g., country-us-sessionlength-3600-...)
In the Password field, paste the corresponding password
Then click Save changes to apply the authentication.
7. Once all the proxy settings and authentication details are filled in, click the ‘Apply changes’ button in the left-hand sidebar under the ‘Actions’ section to activate your SimplyNode proxy profile
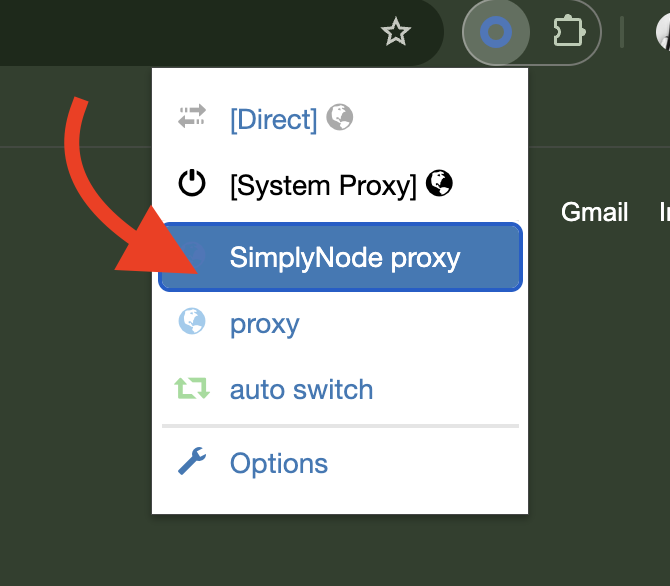
8. Click on the extension icon in your browser toolbar and select your ‘SimplyNode proxy’ profile to activate the proxy connection
How to Use Proxy SwitchyOmega
Once you’ve configured your proxy profiles in Proxy SwitchyOmega, managing your connections becomes simple and efficient. Just click the extension icon in your browser’s toolbar to see a dropdown menu with all your saved profiles. Choose the one you want — and your browser will start routing traffic through the selected proxy server.
Setting Up Auto-Switch Rules
For more advanced control, you can set up automatic switching rules based on specific URL patterns. This is especially useful when you want to use different proxies for different types of websites — for example, one for streaming services and another for regular browsing.
Proxy SwitchyOmega’s "Auto Switch Mode" allows the extension to change proxy profiles automatically based on the conditions you define, such as website domain or network type. This turns the extension into a powerful proxy management tool, giving you dynamic control with minimal effort.
Troubleshooting Common Issues
Even though SwitchyOmega is highly convenient, users may encounter occasional issues. Here are some typical problems and how to solve them:
Proxy Not Working
Verify Proxy Settings: Double-check that you’ve entered the correct proxy details — including IP address, port number, and login credentials if required. Also, make sure the correct proxy type (e.g., SOCKS5 or HTTP) is selected.
Test the Connection: Use an external proxy tester or your browser’s developer tools to see if the proxy itself is functional, independently of the extension.
Slow Internet Speed
Try a Different Server: You might be using a slow or overloaded proxy server. Switching to another one — preferably closer to your location — can help.
Avoid Free Proxies: Free proxies are often unreliable and slow. Paid proxy services usually offer much better performance and stability.
DNS Leaks
Adjust DNS Settings: To prevent DNS leaks, enable the DNS-related options in SwitchyOmega settings and consider using privacy-friendly DNS providers like Google DNS or OpenDNS.
Extension Not Working After Browser Update
Reinstall the Extension: Browser updates can sometimes disrupt extensions. If SwitchyOmega stops working, uninstall it and then reinstall it from the Chrome Web Store or Firefox Add-ons page.
Extension Icon Missing from Toolbar
Check if It’s Enabled: Go to your browser’s extensions page (chrome://extensions for Chrome or about:addons for Firefox) and make sure Proxy SwitchyOmega is turned on.
Pin the Icon: Sometimes the icon is simply not pinned. Right-click the toolbar, choose "Customize," and drag the SwitchyOmega icon to a visible spot for easy access.
Following these steps should resolve the majority of issues with Proxy SwitchyOmega. If the problem persists, make sure you're using the latest version of the extension or consider reaching out to the user community for additional support.
:format(webp))
:format(webp))
:format(webp))