:format(webp))
Managing multiple accounts, running ads, or scraping data often requires more than just proxies - you also need a reliable anti-detect browser. BitBrowser is one of the most popular solutions for this, and when combined with SimplyNode proxies, it becomes a powerful setup for stable, scalable workflows.
In this guide, you’ll learn how to properly integrate SimplyNode proxies with BitBrowser and avoid common mistakes that can lead to bans or unstable sessions.
What Is BitBrowser and Why Use It with Proxies?
BitBrowser is an anti-detect browser designed to create and manage multiple isolated browser profiles. Each profile mimics a unique device with its own fingerprint, cookies, and environment.
However, without proxies, all profiles would still share your real IP - which defeats the purpose.
That’s where SimplyNode proxies come in:
Assign a unique IP to each profile
Match GEO to your target audience
Reduce bans and detection risks
Enable scalable multi-account workflows
What You Need Before Setup
Before you start, make sure you have:
A SimplyNode account
Active residential or mobile proxy traffic
Your proxy credentials (host, port, username, password)
Installed BitBrowser
Step 1: Get Your Proxy Credentials in SimplyNode
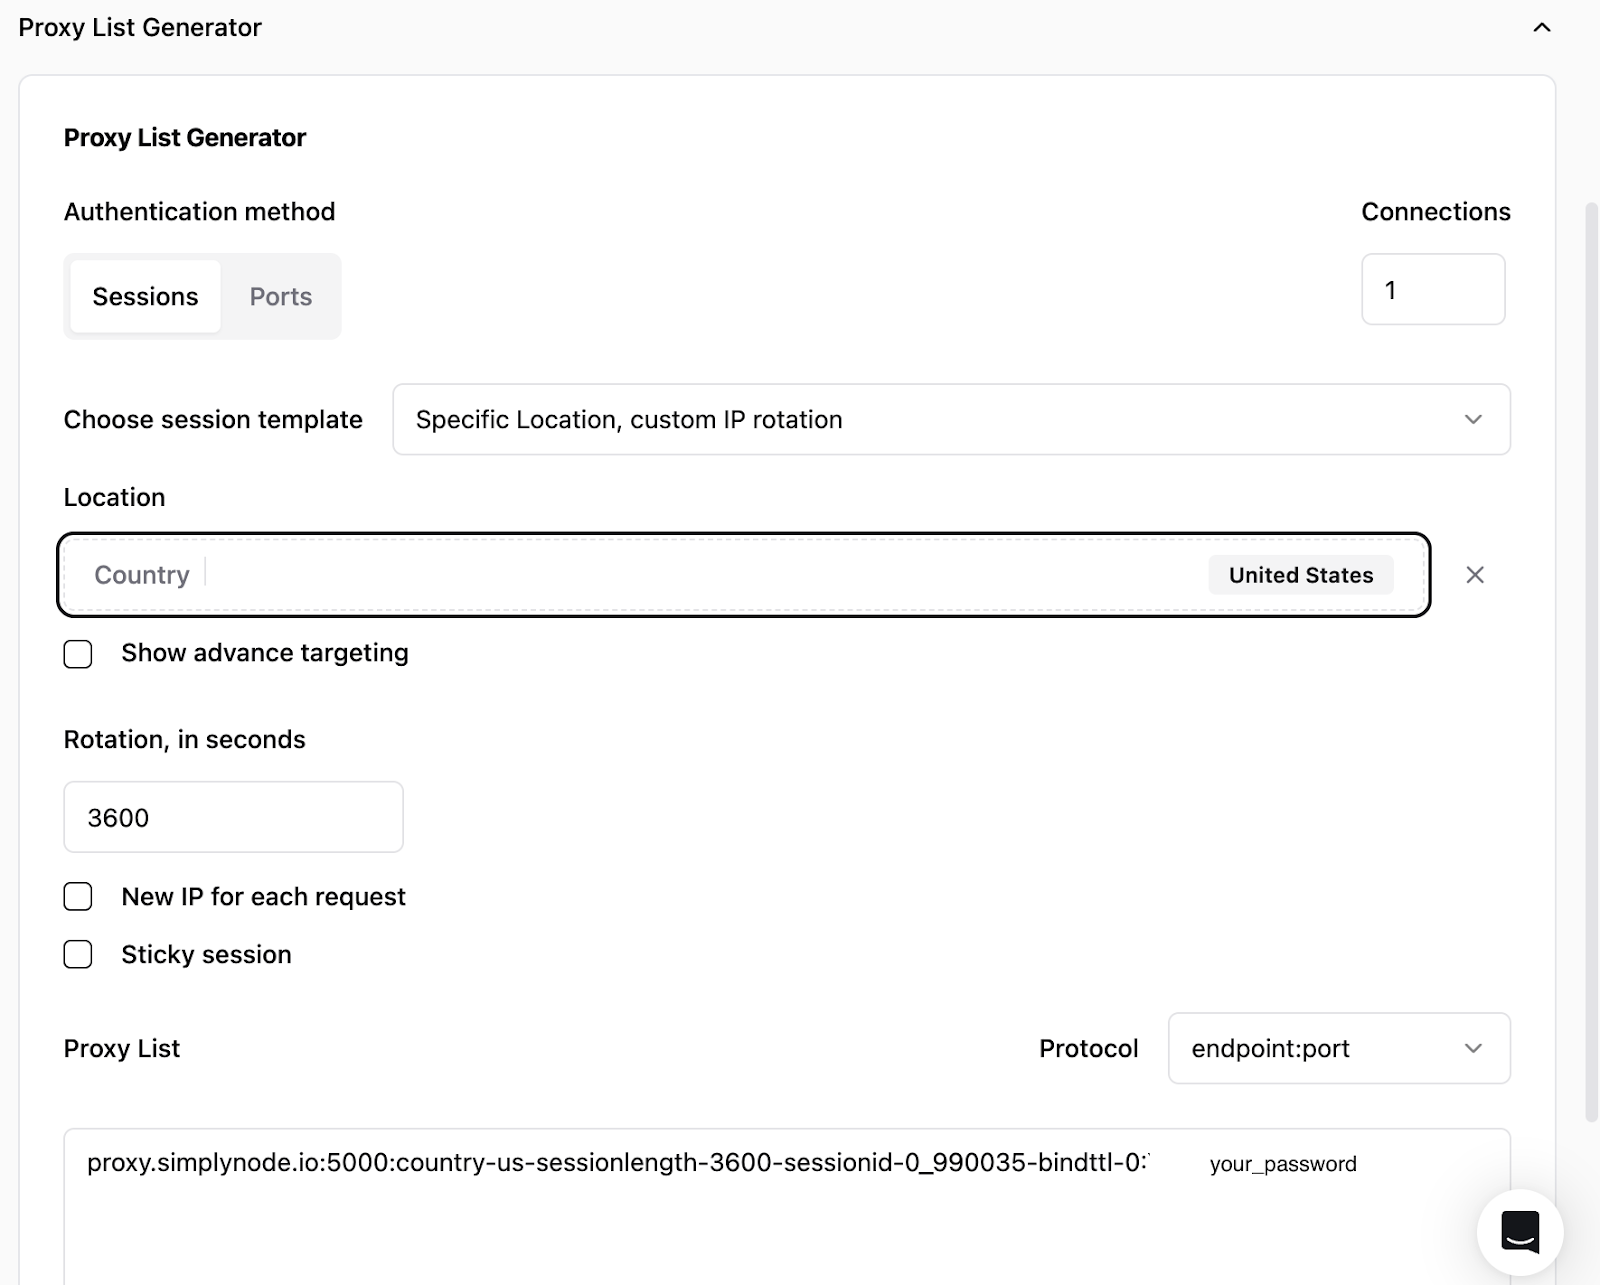
Log in to your SimplyNode dashboard and generate a proxy.
You’ll typically see something like:
Host: @proxy.simplynode.io
Port: 5000
Username: country-us-sessionid-123….
Password: your_password
These credentials define:
GEO (country/city)
Session behavior (sticky or rotating)
Targeting parameters
Step 2: Open BitBrowser and Create a New Profile
Launch BitBrowser
Click "Create Profile"
Fill in basic profile details (name, group, etc.)
At this stage, BitBrowser is preparing a clean browser environment.
Step 3: Add a Proxy to the Profile
In the profile creation window:
Go to the Proxy Settings section
Choose:
Proxy Type: HTTP or SOCKS5 (depending on your setup)
Enter your SimplyNode credentials:
Host
Port
Username
Password
Important:
Always use authentication-based proxies (username/password), not IP whitelisting — BitBrowser works best with login credentials.
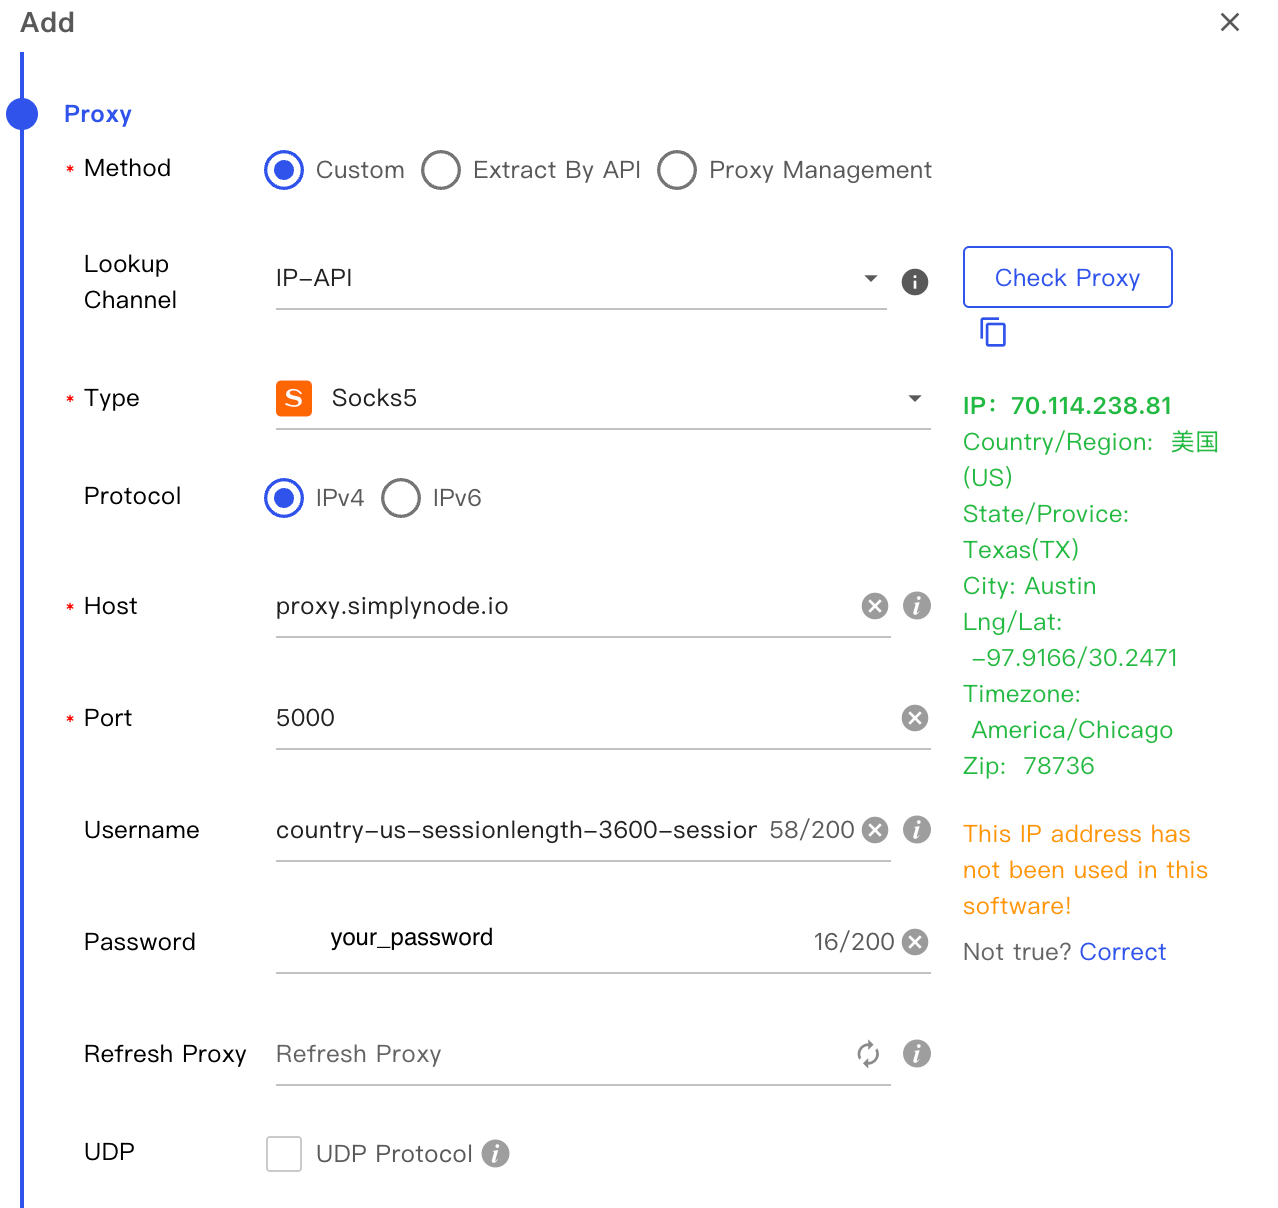
Step 4: Test the Proxy Connection
Before launching the profile:
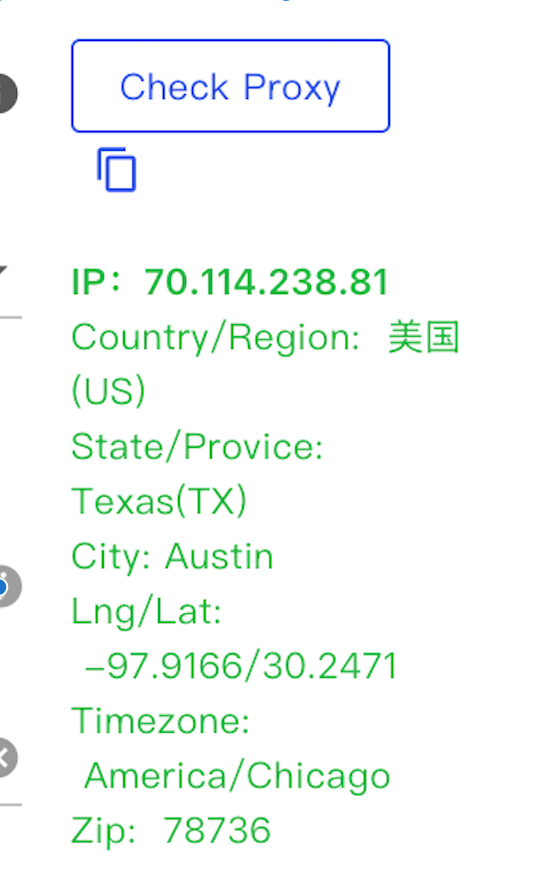
Click "Check Proxy" or "Test Connection"
Make sure:
IP is detected correctly
GEO matches your target country
No connection errors
If something fails:
Double-check credentials
Ensure your SimplyNode traffic is active
Verify session format in username
Step 5: Launch the Profile
Once the proxy is verified:
Click "Open" on the profile
A new browser window will launch with:
Unique fingerprint
Assigned proxy IP
Clean session environment
Now you can safely:
Log into accounts
Run ads
Scrape data
Perform automation tasks
Step 6: Verify Your IP and GEO
Inside the opened profile:
Visit a site like:
https://ip-api.com/
Check:
IP location
ISP type (residential/mobile)
Consistency with your setup
Choosing the Right Proxy Type
For BitBrowser workflows, your proxy type matters a lot.
Residential Proxies
Best for:
Ad accounts (Facebook, Google Ads, TikTok)
Account farming
Social media management
Mobile Proxies
Best for:
High-trust environments
Aggressive scaling
Reducing bans
Common Mistakes to Avoid
1. GEO Mismatch
If your proxy is US but your account is EU → higher ban risk.
2. Reusing the Same Proxy
One proxy = one profile (ideally).
3. No Warm-Up
Launching accounts aggressively from a fresh profile increases detection.
4. Wrong Proxy Type
Datacenter proxies are often too risky for anti-detect setups.
Pro Tips for Better Performance
Use one proxy per profile
Match:
Timezone
Language
GEO
Warm up accounts before scaling
When to Use SimplyNode with BitBrowser
This setup is especially useful for:
Affiliate marketing
Multi-account management
Ad verification
E-commerce automation
Web scraping with identity separation
BitBrowser alone gives you fingerprint isolation - but without high-quality proxies, it’s incomplete.
SimplyNode adds the missing layer:
Clean IPs
GEO targeting
Stable sessions
Together, they create a reliable environment for scaling accounts safely.
:format(webp))
:format(webp))
:format(webp))